CNC Sign Artwork Files: Drawing and RFQ Handoff Checklist
Written by: AeroSignage GlobalReviewed by: AeroSignage Editorial TeamPublished:Updated:
A useful CNC signage handoff combines editable artwork with a dimensioned drawing, a relief and finish map, a variable-message schedule and an approval record. Use the checklist to separate a quotation reference from a file approved for production.
What files does a manufacturer need for CNC-carved signs?
Send editable vector or CAD geometry plus a dimensioned PDF showing units, overall size, base thickness, raised and recessed areas, finishes and mounting. For changing room numbers or addresses, add a schedule that links every message to a sign type and quantity. A PDF, AI or SVG extension alone does not guarantee usable vector paths. Reference photos can start a discussion; the approved drawing and schedule define what is produced.
Production-ready artwork should support CNC path planning, material review, finish selection, and quotation.
1. Separate visual reference from production geometry
Each file has a different job. Editable artwork supplies shapes and lettering; the drawing states measurements and construction; a photograph or rendering explains the desired appearance. Label these roles so a workshop does not have to infer a dimension from an image or treat a mood-board finish as an approved sample.
Include the unit system and at least one known overall dimension on the drawing. State whether the artwork is full size and identify any scaled views. Width, height, base thickness and total assembled depth are separate measurements. An illuminated box, a flat plaque and separate raised digits should not share one ambiguous depth field.
Keep an editable master and send a production copy with the lettering appearance fixed as agreed with the manufacturer. If text is converted to outlines, also retain the correct text in the message schedule; converting it does not proofread a room number or street name. Reopen the handoff on a separate machine or ask the recipient to confirm the preview before release.
Adobe Illustrator’s Package command collects the document, linked graphics and permitted fonts, and can produce a report identifying missing fonts or links. Adobe notes that font licensing must allow copying and that its font-collection option excludes CJK fonts. Check those limitations rather than assuming a packaged folder contains everything.
Inspect the artwork for duplicate contours, open shapes where a closed profile is intended, stray objects and conflicting dimensions. Distinguish a line that indicates a cut from a stroke that is merely visual. Supply a marked PDF explaining any uncertain element; the workshop should confirm the machining interpretation before programming.
Minimum handoff package for a useful manufacturing review
File or record
What it defines
Check before sending
Editable artwork: AI, SVG, CDR, DWG or a vector PDF
Outlines, lettering, logos and production geometry
The file contains usable paths rather than only an embedded screenshot
Dimensioned PDF
Units, overall size, thickness, relief levels and mounting
Dimensions agree with the artwork and the sign-type schedule
Finish reference
Material appearance, finish zones, texture and approval target
Reference ID and intended substrate are identified
Message and quantity schedule
Every room number, address, name, icon or arrow variant
Each entry links to a sign type, revision and packing group
Location and fixing information
Wall or door construction, exposure and attachment context
Site constraints and the installation reviewer are recorded
2. Mark raised, recessed, hollow, printed, and polished areas
Mark the stock thickness and the reference face, then identify what is removed, retained, assembled separately or printed. A note saying 2 mm relief is incomplete if it does not say whether the background is recessed by that amount, a separate numeral is added, or the face has several levels. The dimensions must leave a buildable body and suitable fixing engagement.
A suggested naming scheme is OUTLINE, RECESS, RAISED_FACE, THROUGH_CUT, DRILL, PRINT and FINISH. These are handoff labels, not a universal CAM convention. Add a legend and confirm the workshop interpretation. For sculpted surfaces, explain the intended shape and ask what additional modeling or relief file is needed; a flat vector outline may define the boundary without defining the surface.
Ask for a manufacturability check on narrow strokes, small gaps, internal corners, deep pockets and fragile projections. Autodesk’s machining guidance explains why cutter engagement and internal radii affect the toolpath and finish. Do not specify an arbitrary universal minimum detail size: the material, cutter, depth, geometry and finishing route need to be reviewed together.
3. Provide thickness, mounting, and environment details
Provide a section or side view when the sign combines a base, separate numbers, layers, standoffs or lighting. Label base thickness, relief levels and total assembled projection independently. Flag any weight or clearance constraint for review rather than assuming the chosen face dimension defines the whole construction.
Show fixing positions on the drawing and attach photographs of the receiving surface. Record whether the sign is indoors or outdoors, any exposure concerns and who approves the fixing method. If the sign is illuminated, add the agreed power and service-access information. If it carries tactile content, use the project-approved content and dimensions rather than decorative approximations.
4. Treat finish as a specification, not a color word
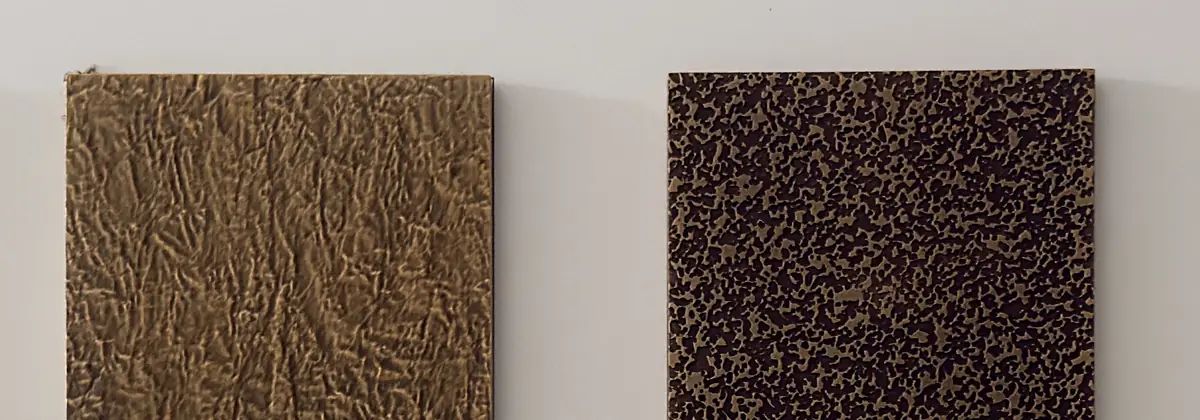
State the substrate separately from the appearance. Brass-effect aluminum, solid brass and bronze-colored paint describe different specifications. Assign each finish zone a reference: background, raised text, edge, border and any printed detail. For brushing or hand-aged work, record direction, acceptable variation and the representative sample used for approval. A screen color or photograph is a reference, not proof of an exact physical match.
Mark the finish reference directly against the correct drawing zone. If a sample needs changing, record what changes and what remains approved. Confirm whether a metallic appearance is paint, plating, polishing or another proposed process during quotation review; do not use the same color name as a substitute for that construction decision.
5. Package files around how the order will be produced
Treat the sign schedule as production data. Use a stable sign code for each location and record the exact message, type, quantity, revision, floor or zone and packing label. Preserve leading zeros by checking spreadsheet text formatting. Proofread arrows and icons as carefully as spelling; a correct-looking plaque with the wrong direction is still the wrong sign.
Use one revision identifier across the drawing, artwork and schedule. An example filename is HOTEL_A_ROOM_TYPE_R01_REV03.pdf; the actual naming system matters less than consistency. Keep superseded versions outside the production release folder and include a short change list when the design is revised.
Record the approval stage explicitly: quotation only, sample release or batch release. A price discussion does not approve manufacture. When the sample changes, update the drawing and schedule before releasing the remaining quantity. Name one approval owner so instructions arriving through different messages cannot silently conflict.
Group the package into artwork, dimensioned drawings, finish references, message schedule, installation photographs and approval notes. Add a brief file index stating the current revision and the purpose of each folder. ZIP is useful when several files belong together; it should contain the current release, not an unfiltered archive of every draft.
If artwork is still incomplete, send the clearest reference together with dimensions, quantity, material preference and intended installation. State what needs drawing assistance or production review. This allows a useful first discussion while keeping unresolved geometry or finish decisions visible before a formal manufacturing approval.
Release checks before the manufacturing stage changes
Stage
Check
Record to retain
Quotation
Known inputs and unresolved assumptions are separated
RFQ revision, scope and question list
Sample
Geometry, finish target, mounting and representative message are agreed
Sample drawing revision and acceptance points
Batch
Accepted sample changes appear in the final files and quantities
Approved artwork, drawing, schedule and sample reference
Later replacement
The new message and quantity match the retained sign family
Original order or sign code plus the requested changes
Final send check
A clear handoff shows
Resolve before release
File index
Purpose and revision of each file
Duplicate filenames or unclear draft status
Geometry and dimensions
Agreement between editable paths and the measured PDF
Unexplained scale changes or conflicting sizes
Message schedule
Exact text tied to each type and quantity
Lost leading zeros, wrong arrows or missing variants
Finish and installation
Referenced sample and approved fixing context
A generic color name or an unreviewed mounting assumption
Approval status
Named owner and quotation, sample or batch stage
Unrecorded changes after sample acceptance
From selection to an approved sample
Keep the specification, sample and quotation in agreement
Record the actual base material, finish reference, dimensions, mounting surface and approval owner. Use the sample checklist to note what is accepted and what still needs confirmation before the production release.
Local codes, accessibility requirements, engineering details, and order-specific claims must be confirmed for the destination market before production.
FAQ
Is a PDF enough for CNC sign production?
A PDF can contain vectors, a raster image or both. Include a dimensioned preview and confirm whether editable paths are available. For a complex relief surface, the workshop may need further geometry or modeling information.
Can I send a photograph if I do not have a vector file?
Yes, a clear photograph with size, quantity, material preference and installation context can start the review. Identify any drawing work needed and approve the resulting geometry before manufacture.
Should every hotel room number have its own artwork file?
Use the file structure agreed for the order. A master sign-type drawing with a controlled room schedule may be suitable, while special layouts need separate drawings. Every finished sign must still map unambiguously to its approved message and type.
How should I specify a brass or bronze appearance?
State the actual substrate, then identify the finish reference, zones, texture and sample approval target. A brass-effect finish on aluminum is not the same specification as solid brass.
Fabrication & Materials
Continue with the manufacturing pillar or focused guides for CNC routes, materials, finishes, production files, samples, and quality review.